Baby’s First Ornament

Sewing Projects

I wanted to make my sweetheart-babe her first Christmas tree ornament! It would mean so much more to her anyway. I got the idea from an etsy item and copied it. Isn’t it cute?

White felt at Michaels was about $.40 for a square. Pink embellishing thread was the same price. The bells cost about $4.00, only coming in a pack of a few dozen. Pretty cheap though!


I drew out the shape of the mittens on scrap paper, and used as template to cut 4 mitten shapes

I took a needle and 3 strands of thread and made my baby’s name and year on one single cut of a mitten. I took another mitten and embroidered a heart. The name looks thick because I ran multiple threads next to each other. And on the heart I just did long vertical stitches. Here’s a closer look (this pictures the end product with the blanket stitch which is next):

Time to stitch mittens to their backs. I used this visual to blanket stitch two mittens together. I started on the side and made my way to where the mitten opening would be. Then instead of going through both sides I just did the top, then wound my way around the edge to the other side. I made it up really. She can play with them when she’s a little older. Open mittens are more fun than closed mittens in my book.

I then attached a 6-8″ string to complete the ornament. Don’t forget the bells! I didn’t separate the string, I just cut it straight from the strand. It was an easy project. If you try it out let me know! 

Baby Bibs

Sewing Projects


IMG_4982

AHHHH! I haven’t done a sewing post in ages! Well, if you are in the neighborhood looking for a great bib pattern and tutorial, I hope I can help you out. I love sewing, babies, and you obviously, since I’m writing this and sending it off into the void. So thanks for being here! Let’s get sewing shall we?

You’ll need:

*Fabric for front side of bib (12″x 15″)-Cotton

**Fabric for back side of bib (12″x 15″)-Cotton

Old hand towel (same dimensions), if you’d like a more absorbent bib.

Velcro (about 2 1/2″)

Scissors, thread, a sewing machine, and a needle for hand sewing

*I am making a patchwork-style bib, so I’ll be piecing together scrap fabric. So if you’re doing this as well, this is the dimension you’ll need once your scraps are sewn together.
**Note: This is a reversible bib. If this doesn’t interest you, you may want to skip the fabric for the back side of the bib and just have the old hand towel as the backing. When you get to step 9, simply sew your front cotton piece to your towel right sides together, leaving a hole at the bottom and continue normally.

bib_pattern1

bib_pattern2

Print both pages of the pattern above and tape together.

Instructions (there are plenty of photos beneath for reference):

  1. Wash and dry all your fabric to prep. Lay out your options and iron.
  2. Cut out your towel on the fold.
  3. Now you have a reference to lay your scraps on if you’re doing a patchwork style one like me. So go ahead and cut your scraps out and sew. Make sure that you have an overlap of fabric around the edges of at least 1/4″.
  4. Iron your seams flat.
  5. Fold your new piece of fabric in half, right sides together.
  6. Here’s a picture of my pattern pinned on the fold. Cut!
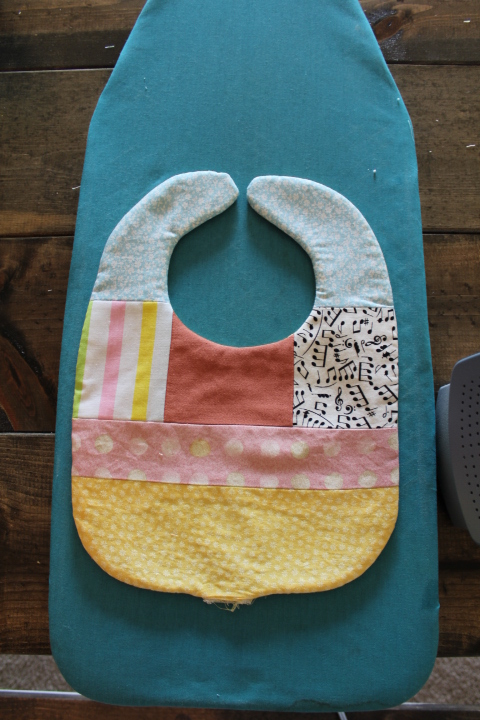
  7. Alright, repeat with the back side of the bib if you choose to do so. Since my front was busy looking, I decided to go for a simple yellow and continue the pink stripe from the front.
  8. Iron all your cotton pieces with the seams laying flat. You should now have all 3 bib-looking things. Sweet!
  9. Layer cottons right side together, then lay the towel on top. Pin.
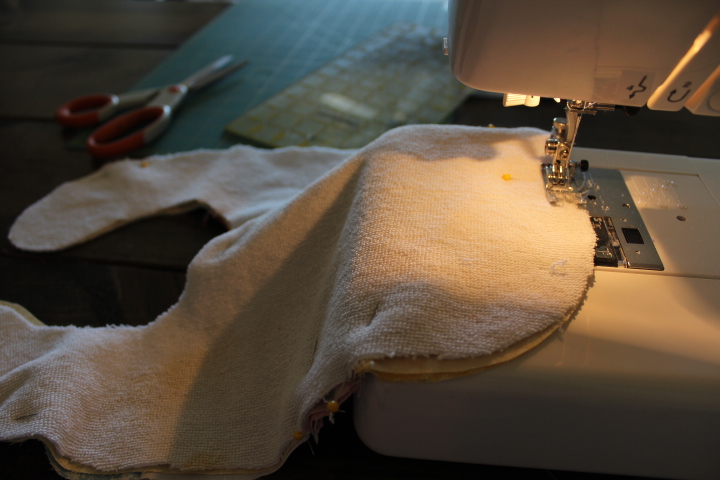
  10. Sew with 1/4″ seam allowance leaving a 3″ gap to pull right side out later. I left my hole on the bottom.
  11. Layer the seams if your bib is bulky. Clip the neckline and notch the straps. I know I don’t have the best example of the clips or the layering. Sorry! To layer, cut a single layer of fabric in the seam allowance a little shorter than the one beneath it. This will decrease bulk. To clip, make small slits without cutting through the stitches. This will help the fabric fan out more easily. The notches on the wings are triangles and it will help ease all that bumpy fabric into a pretty finish.
  12. Pull the bib right side out. My hole was a little small, but it worked out okay. Press.
  13. Hand sew the hole up. I used the invisible stitch. Here is a video if you want help.
  14. Sew your velcro on with a small stitch length to help with wear and tear.

Thank you for coming by! Good luck on your bib! Please feel free to ask questions in the comments or you can email me.

1.IMG_4911

2.

IMG_4905

3.IMG_4924.JPG

4.

IMG_4929

5. Matching up seams to the backsideIMG_4932.JPG

6.

IMG_4939.JPG

7.IMG_4941.JPG

8.

IMG_4943.JPG

9. Layer cottons right side together, then lay the towel on top.

IMG_4950IMG_4953IMG_4956

10.

IMG_4963.JPG

11.

IMG_4968IMG_4966

12.

IMG_4974.JPG

13.

IMG_4977.JPG

14.

IMG_4980

Completed bib!

IMG_4982.JPG

Scarf Dress

Sewing Projects


It was my sister Sarah’s idea.

She bought this silky dress on clearance years ago but never wore it. I was wearing a silky scarf when I went to her house yesterday. It could have been her paying respects to my endless pool of crafty. Maybe it was to lighten the load to her next visit to the thrift store. Either way, I walked out the door with a dress and was told to gut a scarf out of it.


Here is the dress.

Let’s make a scarf!

Start out by cutting out the side seam of the dress on one side so that you can open the dress wide.


If your dress has a zipper, you can salvage it. Free zipper!

Use a seam ripper for those hard to get places.

Your dress should be open now.

Mine was a little “bunchy” near the top. I cut off the bust line and the upper back sections. This took away the gathering on the rest of the fabric.

Spread out a scarf as your pattern piece to see where to cut.

Smooth pattern scarf out

Pin in place

Trim fabric 1 inch outside the pattern to allow room for a seam you will make later. If you have a serger, cut normally.

Snip, snip. After you’re done cutting, fold down the fabric to match the pattern scarf’s size. Pin. You can fold down the fabric twice to keep the fabric from fraying (shown below). Make sure that your folding doesn’t make the scarf smaller than the pattern scarf.

Sew the seams all around your new scarf!

It turned out SO cute!

Leave a comment if you try it! I would love to hear how it worked out for you. Thanks for reading.

Vacation is lovely

Sewing Projects

I can’t tell you how great it feels to be on break.

I have been sleeping in, drinking lots of milk, and and seeing people I love. Now this may sound kind of  ordinary… It actually  is a big deal because 1. I couldn’t sleep in at school, 2. I rationed the milk I buy to last me a whole week, and 3. I didn’t really have many friends at school.

So yes, I am very much enjoying myself visiting home! Christmas was wonderful; I loved every moment just sitting with my family drinking in the good-feeling of being home.

I made my sister an AWESOME Christmas present,

                          if I do say myself.

I made this bright, beautiful bag!

I think she loved it, which makes me happy. I love my little sis.

Now the question is what else should I make?